
Deploy Charmed Kubeflow to Microk8s behind a web proxy
Deploying Charmed Kubeflow on MicroK8s behind a web proxy requires some configuration. The target machine’s environment must be prepared to handle the web proxy prior to deployment. Additionally, Kubeflow components must be configured to work with the web proxy.
Contents:
Prepare your environment
Before you get to Installing Charmed Kubeflow, first you need to set up your client with proxy setttings, and install Microk8s and Juju with proxy configurations.Snap
- Save the value of your proxy server address (PROXY) for reuse
PROXY=http://<username>:<password>@<proxy IP>:<proxy port>/
The proxy IP and proxy port are usually given by your network administrator
Add the username:<password>@ part only if the proxy server is configured with credentials, check with your network administrator.
- Set the snap proxy settings
sudo snap set system proxy.http=$PROXY
sudo snap set system proxy.https=$PROXY
This will enable you to install snap packages
- Restart snap service
sudo systemctl restart snapd.service
Microk8s
- Install Microk8s
sudo snap install microk8s --classic --channel=1.24/stable
- Add user to Microk8s group
sudo usermod -a -G microk8s $USER
newgrp microk8s
This way you don’t have to use sudo for every Microk8s command.
- Enable microk8s add-ons needed to run Charmed Kubeflow. Note that the metallb range can change depending on the use case and the env, but we use this one in all our guides.
microk8s enable dns:$(resolvectl status | grep "Current DNS Server" | awk '{print $NF}')	# This sets the dns to your current nameserver
microk8s enable storage ingress metallb:10.64.140.43-10.64.140.49
- Get the values of the Microk8s cluster-cidr and service-cluster-ip-range stored in
/var/snap/microk8s/current/args/kube-proxyand/var/snap/microk8s/current/args/kube-apiserverrespectively, and save these values in a variable.
cat /var/snap/microk8s/current/args/kube-proxy | grep cluster-cidr

#output
--cluster-cidr=<cluster cidr> # copy this value to the next command

CLUSTER_CIDR=<cluster cidr>
cat /var/snap/microk8s/current/args/kube-apiserver | grep service-cluster-ip-range

#output
-service-cluster-ip-range=<service cluster ip range>  # copy this value to the next command

SERVICE_CIDR=<service cluster ip range>
You will need these two values in the next step and later when installing Juju.
See more: Microk8s | Installing behind a proxy
- Get the Internal IP of the nodes where your cluster is running, you can check that by running:
microk8s kubectl get nodes -o wide
Take note of the INTERNAL-IP value.
Save the IP(s) in a variable with suffix /24, comma-separated if you have a multi-node cluster.
NODE_IP=<nodes internal ip(s)>/24
- Set the proxy settings in
containerd-envModify thecontainerd-envfile located in${SNAP_DATA}/args/containerd-env(normally/var/snap/microk8s/current/args/containerd-env)
HTTPS_PROXY=http://<username>:<password>@<proxy IP>:<proxy port>/
NO_PROXY=<cluster-cidr>,<service-cluster-ip-range>,<nodes internal ip(s)>/24,127.0.0.1
- Restart Microk8s snap to pick up the changes
sudo snap restart microk8s
- Check that Microk8s is running with the desired add-ons
microk8s status

#sample output:
microk8s is running
high-availability: no
  datastore master nodes: 127.0.0.1:19001
  datastore standby nodes: none
addons:
  enabled:
    dns                  # (core) CoreDNS
    ha-cluster           # (core) Configure high availability on the current node
    hostpath-storage     # (core) Storage class; allocates storage from host directory
    ingress              # (core) Ingress controller for external access
    metallb              # (core) Loadbalancer for your Kubernetes cluster
    storage              # (core) Alias to hostpath-storage add-on, deprecated
Juju
- Export the system proxy settings used by the Juju client. Make sure to set the metallb as you configured it when installing Microk8s.
Make sure to replace
<hostname>with your own hostname.
export http_proxy=$PROXY
export https_proxy=$PROXY
export no_proxy=$CLUSTER_CIDR,\
$SERVICE_CIDR\
127.0.0.1,\
$NODE_IP,\
<hostname>,\
.svc,\
.local,\
10.64.140.0/24,\  # This is the metallb IP range
.nip.io
- Install Juju
sudo snap install juju --classic
- Create a Juju controller in your Microk8s cluster and set the proxy model default values. Change the metallb value if you configured it differently.
juju bootstrap microk8s uk8s --model-default juju-http-proxy=$PROXY \
--model-default juju-https-proxy=$PROXY \
--model-default juju-no-proxy=$CLUSTER_CIDR,\
$SERVICE_CIDR\
127.0.0.1,\
$NODE_IP,\
<hostname>,\   # replace with your own hostname
.svc,\
.local,\
10.64.140.0/24   # This is the metallb IP range
- Add Juju model
juju add-model kubeflow # model name must be kubeflow
- Make sure
Kubeflowmodel has your proxy settings, run:
juju model-config
You should see the proxy settings in the juju-http-proxy, juju-https-proxy, and juju-no-proxy variables.
Deploy Charmed Kubeflow
- Deploy Kubeflow bundle
juju deploy kubeflow --channel 1.7/stable --trust
Watch the progress and wait until all charms are up
watch -c juju status --color
- Configure the dashboard URL and credentials. Follow the steps from the Get started tutorial.
- Check if you can access the dashboard URL
curl -I http://10.64.140.43.nip.io --noproxy '*'
You should see a 302 Found response similar to this:
HTTP/1.1 302 Found
location: http://10.64.140.43.nip.io/dex/auth?client_id=authservice-oidc&redirect_uri=%2Fauthservice%2Foidc%2Fcallback&response_type=code&scope=openid+profile+email+groups&state=MTY3OTY2MTYwOXxFd3dBRURWaE9EUnFha3ByZDNwRWEyZzVhREk9fBanXjJZJn5xKjDyvnrMc83mpkCyOt6ATbR0oox_Ppqm
date: Fri, 24 Mar 2023 12:40:09 GMT
x-envoy-upstream-service-time: 482
server: istio-envoy
transfer-encoding: chunked
Use the components behind a proxy
Before you dive into the Charmed Kubeflow components, make sure you know the necessary component configurations for a proxy environment.Notebooks
Apply the following poddefault to your user namespace so each notebook you create will have proxy configurations set. TheNO_PROXY and no_proxy values would be the same as you configured in the Juju model.
cat <<EOF | kubectl apply -n $USER_NAMESPACE -f -
apiVersion: kubeflow.org/v1alpha1
kind: PodDefault
metadata:
  name: notebook-proxy
spec:
  desc: Add proxy settings
  env:
  - name: HTTP_PROXY
    value: http://10.0.1.119:3128/ # replace with $PROXY
  - name: http_proxy
    value: http://10.0.1.119:3128/ # replace with $PROXY
  - name: HTTPS_PROXY
    value: http://10.0.1.119:3128/ # replace with $PROXY
  - name: https_proxy
    value: http://10.0.1.119:3128/ # replace with $PROXY
  - name: NO_PROXY
    value: <cluster cidr>,<service cluster ip range>,127.0.0.1,<nodes internal ip(s)>/24,<cluster hostname>,.svc,.local
  - name: no_proxy
    value: <cluster cidr>,<service cluster ip range>,127.0.0.1,<nodes internal ip(s)>/24,<cluster hostname>,.svc,.local
  selector:
    matchLabels:
      notebook-proxy: "true"
EOF
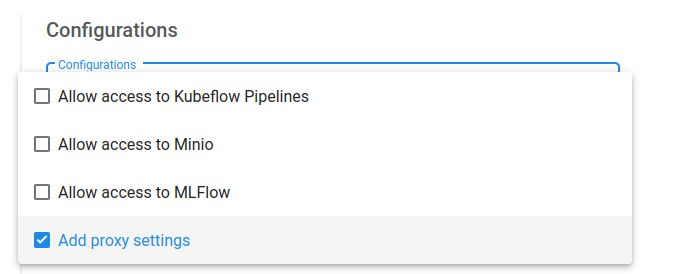
You should now be able to see Add proxy settings when creating a new notebook under Advanced Options > Configurations. Always select that option.
Katib
Before running a Katib experiment, add your proxy envs to your experiment definition for each container underspec.trialTemplate.trialSpec.spec.template.spec.containers
env:
  - name: HTTP_PROXY
    value: http://10.0.1.119:3128/ # replace with $PROXY
  - name: http_proxy
    value: http://10.0.1.119:3128/ # replace with $PROXY
  - name: HTTPS_PROXY
    value: http://10.0.1.119:3128/ # replace with $PROXY
  - name: https_proxy
    value: http://10.0.1.119:3128/ # replace with $PROXY
Expand to see full Katib experiment example
apiVersion: kubeflow.org/v1beta1
kind: Experiment
metadata:
  name: grid-proxy
spec:
  objective:
    type: maximize
    goal: 0.99
    objectiveMetricName: Validation-accuracy
    additionalMetricNames:
      - Train-accuracy
  algorithm:
    algorithmName: grid
  parallelTrialCount: 1
  maxTrialCount: 1
  maxFailedTrialCount: 1
  parameters:
    - name: lr
      parameterType: double
      feasibleSpace:
        min: "0.001"
        max: "0.01"
        step: "0.001"
    - name: num-layers
      parameterType: int
      feasibleSpace:
        min: "2"
        max: "5"
    - name: optimizer
      parameterType: categorical
      feasibleSpace:
        list:
          - sgd
          - adam
          - ftrl
  trialTemplate:
    primaryContainerName: training-container
    trialParameters:
      - name: learningRate
        description: Learning rate for the training model
        reference: lr
      - name: numberLayers
        description: Number of training model layers
        reference: num-layers
      - name: optimizer
        description: Training model optimizer (sdg, adam or ftrl)
        reference: optimizer
    trialSpec:
      apiVersion: batch/v1
      kind: Job
      spec:
        template:
          metadata:
            annotations:
              sidecar.istio.io/inject: "false"
          spec:
            containers:
              - name: training-container
                image: docker.io/kubeflowkatib/mxnet-mnist:latest
                command:
                  - "python3"
                  - "/opt/mxnet-mnist/mnist.py"
                  - "--batch-size=64"
                  - "--lr=${trialParameters.learningRate}"
                  - "--num-layers=${trialParameters.numberLayers}"
                  - "--optimizer=${trialParameters.optimizer}"
                env:
                  - name: HTTP_PROXY
                    value: http://10.0.1.119:3128/
                  - name: http_proxy
                    value: http://10.0.1.119:3128/
                  - name: HTTPS_PROXY
                    value: http://10.0.1.119:3128/
                  - name: https_proxy
                    value: http://10.0.1.119:3128/
            restartPolicy: Never
Pipelines
If your pipeline needs to download data or pull an image, you can inject your proxy envs into a pipeline from inside a notebook with the kfp sdk as done in this example notebook.Istio
If you’re having trouble accessing the Charmed Kubeflow components, you might need to configure proxy settings for Istio.kubectl apply -n kubeflow -f - <<EOF
apiVersion: networking.istio.io/v1beta1
kind: ServiceEntry
metadata:
name: proxy
spec:
hosts:
- my-company-proxy.com # ignored
addresses:
- 10.0.1.119/32 # replace with proxy IP
ports:
- number: 3128 # replace with proxy port
name: tcp
protocol: TCP
location: MESH_EXTERNAL
EOF
Last updated 6 months ago.